
t440p_external.md 3.4 KB
title: ThinkPad T440p external flashing x-toc-enable: true ...
Read the Ivybridge/Haswell common guide if you want more information. All of the following instructions assume that you've cloned lbmk and are operating from the root of that project. To do so, run
git clone https://notabug.org/libreboot/lbmk
cd lbmk
You can now follow the rest of the instructions.
Preparing a release Rom
You must patch the release rom with the necessary blobs and then flash it to your board.
Lbmk includes a script that will automatically inject the necessary blobs into a rom file.
The script can determine the board automatically if you have not changed the name, but you can also manually set the board name with the -b flag.
In order to inject the necessary blobs into a rom image, run the script from the root of lbmk and point to the rom image.
For example (libre replacement of mrc.bin):
./blobutil inject -r t440p_libreboot.rom -b t440p_12mb
Optionally, you can use this script to modify the mac address of the rom with the -m flag.
For example:
./blobutil inject -r t440p_libreboot.rom -b t440p_12mb -m 00:f6:f0:40:71:fd
If you're flashing a ROM that needs blob mrc.bin, you would do one of these
instead, for example:
./blobutil inject -r t440p_libreboot.rom -b t440pmrc_12mb
or (inserting a different MAC address)
./blobutil inject -r t440p_libreboot.rom -b t440pmrc_12mb -m 00:f6:f0:40:71:fd
NOTE: this makes use of nvmutil, which you can read more about in
the nvmutil documentation.
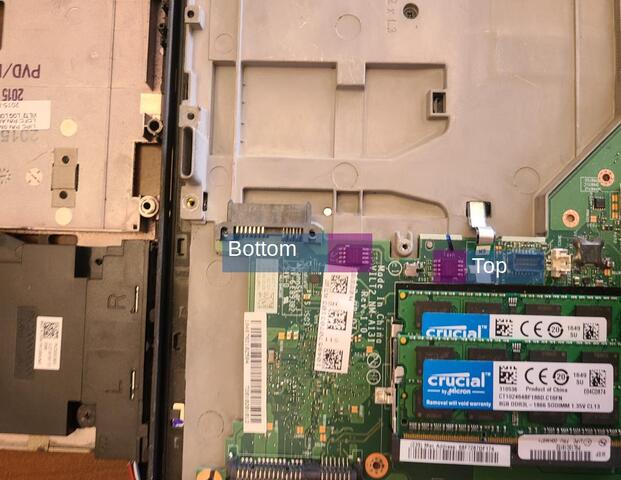
Splitting The Rom
You can use dd to easily split your rom into the two separate portions for
external flashing.
dd if=libreboot.rom of=top.rom bs=1M skip=8
dd if=libreboot.rom of=bottom.rom bs=1M count=8
Flash the top chip with top.rom, and tho bottom chip with bottom.rom. Don't worry about knowing which chip is which on a standard setup; flashrom will let you know if the image size is incorrect for the chip you're flashing.
Disassembly
Start by removing the back cover screws and the main battery.\
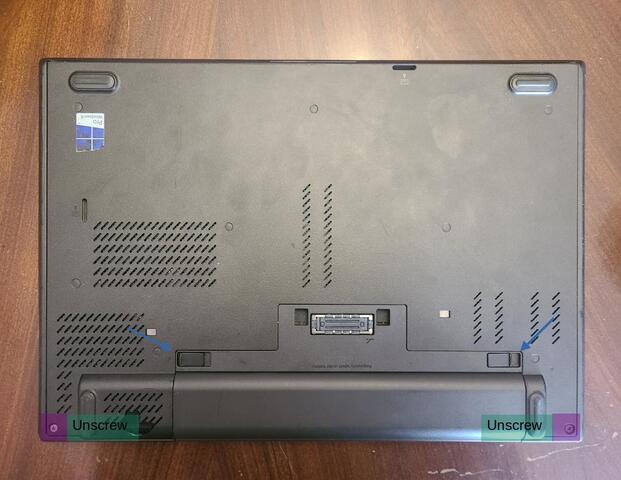
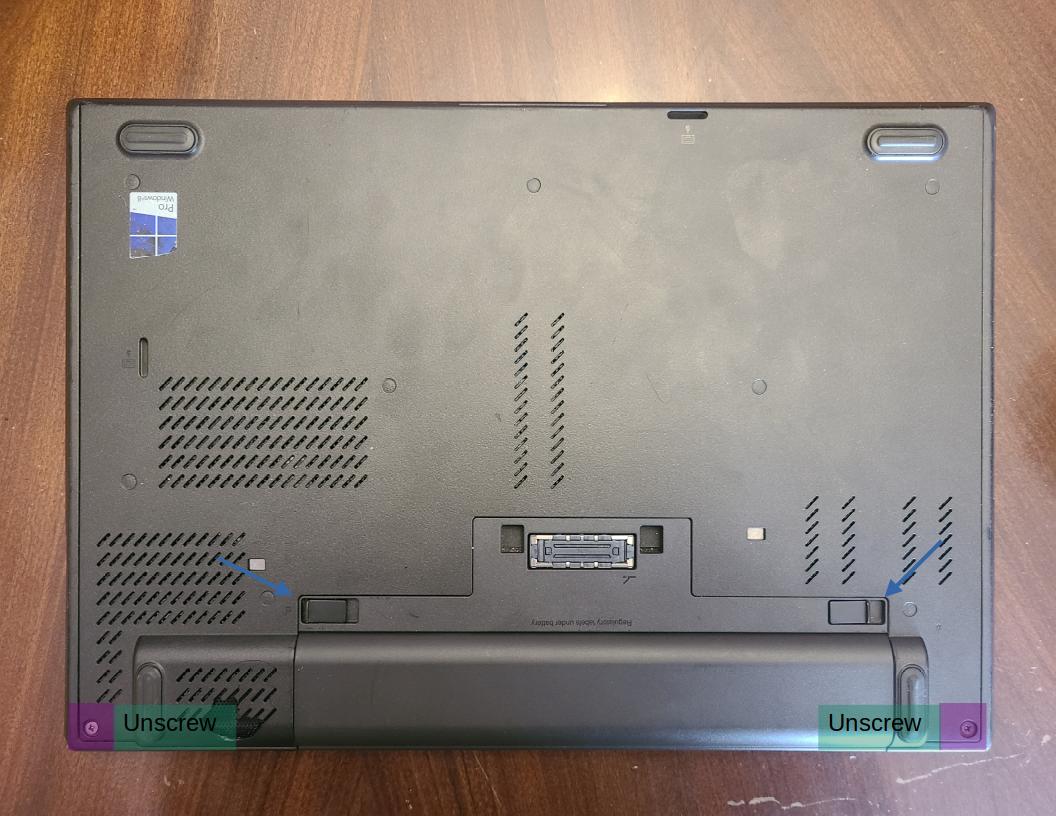
You can then remove the back cover by sliding it off. Next you need to:
- Unplug the cmos battery
- Unplug and unroute the fan cable
- Unplug and unroute the black LED cable
- Remove all visible screws
Note: the ultrabay screw will loosen, but not come out of the assembly\

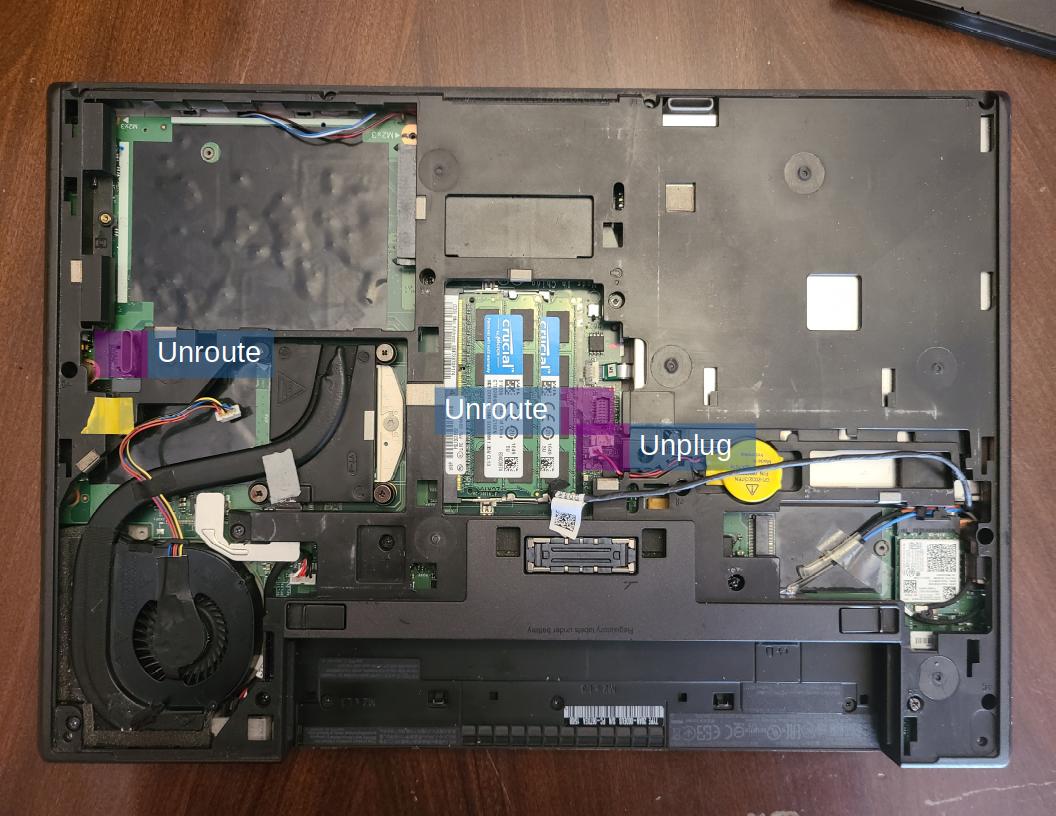
Now you can pull up around the sides of the bottom assembly to release it.
Pull it upwards and lift it open to the front of the machine like a clamshell.
Make sure not to break the wires connecting the assembly to the rest of the machine.\
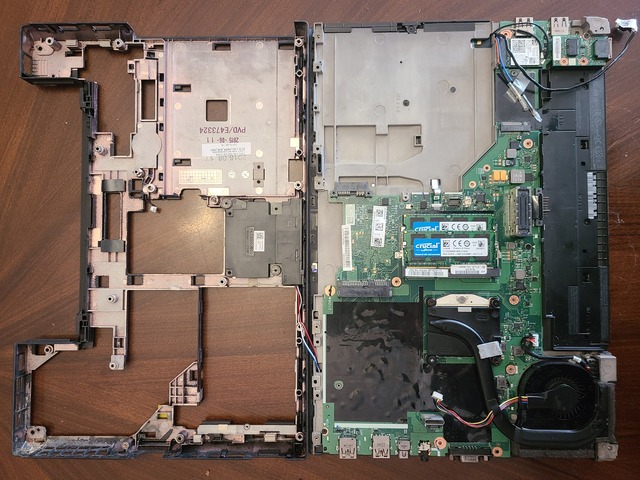
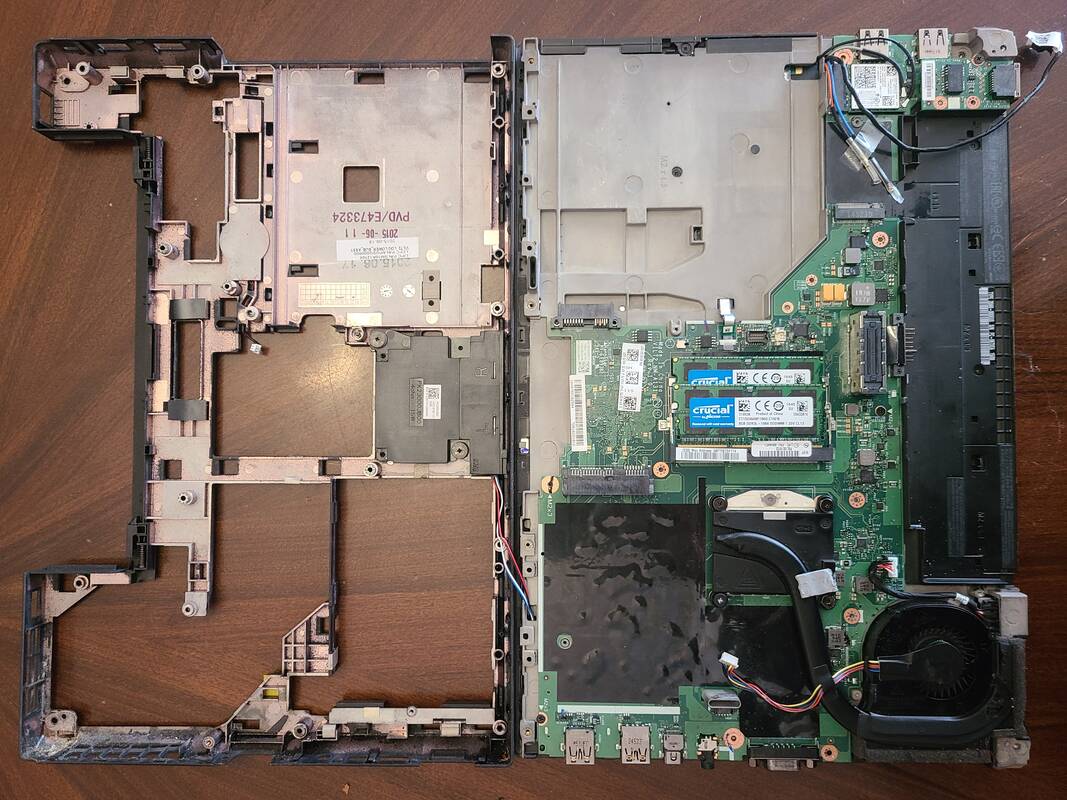
You should now be able to see the two flash chips near the RAM.\

You can now proceed to flashing this machine.